Pages

Showing posts with label Daring Baker's. Show all posts

Friday, January 27, 2012

The Daring Baker's Scones...in search of the best!


When Camera Guy and I visited England and Scotland in July, we got into the habit of having afternoon scones. Oh yes...we were "Sconeheads"   And I mean we had the whole works- clotted cream, butter, jam and some wonderful tea for the finishing touch....  Each afternoon, he would mention " Isn't it time we stopped somewhere for scones?"  We considered ourselves experts, rating scones wherever we went- The Isle of Skye serving up the best ...but they would not share the recipe... too bad, because they were really good.   We actually had to end this foolishness when I started having difficulty fitting in the car!


And so we declared that every Sunday when we returned home to Canada,  we would have scones... We actually enjoyed this every Sunday for a month or so and then we moved and that is another story (Moving is not fun!)

The Daring Baker's challenge this month is scones!

Audax Artifex was our January 2012 Daring Bakers’ host.. Aud worked tirelessly to master light and fluffy scones (a/k/a biscuits) to help us create delicious and perfect batches in our own kitchens!


Basic scones (a.k.a. Basic Biscuits)
Starring our fabulous ingredients

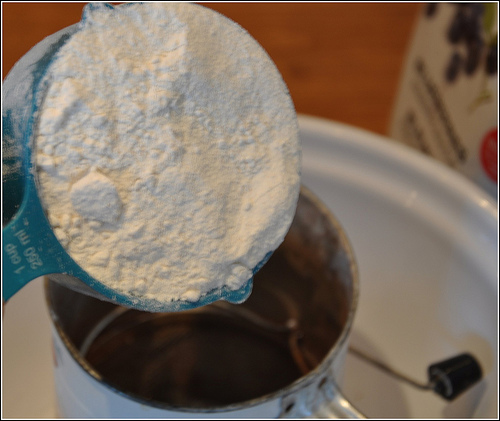
Add Flour to the sifter over a big bowl


Then Baking Powder


And Salt

Sift 3 times (I must confess - I only sifted once)

Introducing Graeta !  Grate frozen butter....


Doesn't she look proud?  We bought her in Vienna.

Rub in the Butter with your fingertips until  it looks like coarse bread crumbs

Add the blueberries and 1 tbsp sugar
then add the milk until a sticky dough

Pat into a rectangle 6 x4 inches


Cut out scones  (Biscuits) - I had a square cutter

Place on cookie sheet - just touching... so cute!

Bake and serve warm....

with homemade jam...I called this Strawberry Fields Forever...

So you may be saying- but they are blueberry scones why strawberry jam?  Because - who cares?  Warm scones, butter and jam - any jam! ...simply delightful.
I am going to surprise Camera Guy with breakfast in bed!
He ate four!....He really does love my baking.


Thanks again Audax for hosting this month!  
Until we bake again...
Penny


Here is the recipe:
Starring- in order of Appearance!


Servings: about eight 2-inch (5 cm) scones or five 3-inch (7½ cm) scones
The recipe can be doubled:
  • 1 cup (240 ml) (140 gm/5 oz) plain (all-purpose) flour

  • 2 teaspoons (10 ml) (10 gm) (1/3 oz) fresh baking powder

  • ¼ teaspoon (1¼ ml) (1½ gm) salt

  • 4 tablespoons (30 gm/1 oz) frozen grated butter (or a combination of crisco and butter)  

  • 1/4 cup dried Blueberries (or strawberries or raisins etc) (45 gm)

  • Approximately ½ cup (120 ml) cold buttermilk

  • 1 Tablespoon sugar (15 gm)

  • Optional 1 tablespoon milk, for glazing the tops of the scones

Directions:

1. Preheat oven to very hot 475°F/240°C/gas mark 9.


2. Triple sift the dry ingredients into a large bowl. (If your room temperature is very hot

refrigerate the sifted ingredients until cold.)


3. Rub the frozen grated butter (or combination of fats) into the dry ingredients until it resembles

very coarse bread crumbs with some pea-sized pieces if you want flaky scones or until it

resembles coarse beach sand if you want tender scones.


3A. Add the dried fruit and 1 tablespoon sugar


4. Add nearly all of the liquid at once into the rubbed-in flour/fat mixture and mix until it just

forms a sticky dough (add the remaining liquid if needed). The wetter the dough the lighter

the scones (biscuits) will be!


5. Turn the dough out onto a lightly floured board, lightly flour the top of the dough. To achieve

an even homogeneous crumb to your scones knead very gently about 4 or 5 times (do not

press too firmly) the dough until it is smooth. To achieve a layered effect in your scones knead

very gently once (do not press too firmly) then fold and turn the kneaded dough about 3 or 4

times until the dough has formed a smooth texture. (Use a floured plastic scraper to help you

knead and/or fold and turn the dough if you wish.)


6. Pat or roll out the dough into a 6 inch by 4 inch rectangle by about ¾ inch thick (15¼ cm by 10

cm by 2 cm thick). Using a well-floured 2-inch (5 cm) scone cutter (biscuit cutter), stamp out

without twisting six 2-inch (5 cm) rounds, gently reform the scraps into another ¾ inch (2 cm)

layer and cut two more scones (these two scones will not raise as well as the others since the

extra handling will slightly toughen the dough).  Or use a well-floured sharp knife to form

squares or wedges as you desire.


7. Place the rounds just touching on a baking dish if you wish to have soft-sided scones or place

the rounds spaced widely apart on the baking dish if you wish to have crisp-sided scones.

Glaze the tops with milk if you want a golden colour on your scones or lightly flour if you

want a more traditional look to your scones.


8. Bake in the preheated very hot oven for about 10 minutes  (check at 8 minutes since home

ovens at these high temperatures are very unreliable) until the scones are well risen and are

lightly coloured on the tops. The scones are ready when the sides are set.


9. Immediately place onto cooling rack to stop the cooking process, serve while still warm.


Variations on the Basic recipe

Cheese and Chive – follow the Basic recipe above but add ¼ teaspoon of baking soda, after Step 2 add

½ teaspoon sifted mustard powder, ¼ teaspoon sifted cayenne pepper (optional), ½ cup (60 gm/2 oz)

grated cheese and 2 tablespoons finely chopped chives into the sifted ingredients, in Step 3 aim of

beach sand sized pieces of fat coated in flour, in Step 5 knead the dough, rounds are widely spaced in

the baking dish, sprinkle the rounds with cracked pepper.


Storage & Freezing Instructions/Tips:

Scones are best eaten warm. Scones (biscuits) are really easy to store – bag the cooked and cooled scones and freeze until needed then reheat in a moderate hot for a few minutes.


Saturday, July 30, 2011

Strawberries...Fresh Frasiers, A Daring Baker's Challenge


This month's challenge is a beautiful fresh Fraisier.  Mine didn't turn out as beautiful as I would have liked but it tasted good!  Elmo and Camera Guy ate it up and I admit I participated as well.   It really has that summer berry creamy taste...not too sweet....you just don't taste the thousands of calories!!!!!

Jana of Cherry Tea Cakes was our July Daring Bakers’ host and she challenged us to
make Fresh Frasiers inspired by recipes written by Elisabeth M. Prueitt and Chad Robertson in the
beautiful cookbook Tartine.

You can really do some of the steps ahead of time and I suggest you do, as it makes it a little easier to manage- especially the washing of all your kitchen equipment and dishes. 

Here is the recipe!

Basic Chiffon Cake:


Ingredients:

1 cup + 2 tablespoons (270 ml) (5½ oz/155 gm) all-purpose flour
1 teaspoon (5 ml) (4 gm) baking powder
3/4 cups (180 ml) (6 oz /170 gm) sugar
1/2 teaspoon (2½ ml) (1½ gm) salt, preferably kosher
1/4 cup (2 fl oz/60 ml) vegetable oil
3 large egg yolks
⅓ cup + 1 tablespoon (3.17 fl oz/95 ml) water
1 teaspoon (5 ml) pure vanilla extract
3/4 teaspoon (3¾ ml) (3 gm) lemon zest, grated
5 large egg whites
¼ teaspoon (1¼ ml) (1 gm) cream of tartar

Directions:
1.Preheat the oven to moderate 325°F (160°C/gas mark 3).

2.Line the bottom of an 8-inch (20 cm) spring form pan with parchment paper. Do not grease the sides of the pan.

3.In a large mixing bowl, stir together the flour and baking powder. Add in all but 3 tablespoons (45 ml.) of sugar, and all of the salt. Stir to combine.

4.In a small bowl combine the oil, egg yolks, water, vanilla and lemon zest. Whisk thoroughly.

5.Combine with the dry ingredients and mix thoroughly for about one minute, or until very smooth.

6.Put the egg whites into a stand mixer, and beat on medium speed using a whisk attachment on a medium speed, until frothy. Add cream of tartar and beat on a medium speed until the whites hold soft peaks. Slowly add the remaining sugar and beat on a medium-high speed until the whites hold firm and form shiny peaks.

7.Using a grease free rubber spatula, scoop about ⅓ of the whites into the yolk mixture and fold in gently. Gently fold in the remaining whites just until combined.

8.Pour the batter into the prepared pan. Bake for 45 to 55 minutes or until toothpick inserted into the center comes out clean.

9.Removed the cake from the oven and allow to cool in the pan on a wire rack.

10.To unmold, run a knife around the sides to loosen the cake from the pan and remove the spring form sides. Invert the cake and peel off the parchment paper. Refrigerate for up to four days.

Pastry Cream Filling:
Ingredients:

1 cup (8 fl oz/250 ml) whole milk
1/2 teaspoon (2½ ml) pure vanilla extract
1/8 teaspoon (1/2 ml) (¼ gm) salt, preferably kosher
2 tablespoons (30 ml) (10 gm)cornstarch
1/4 cup (60 ml) (2 oz/55 gm) sugar
1 large egg
2 tablespoons (30 ml) (1 oz/30 gm) unsalted butter
3/4 teaspoon (3¾ ml) (4 gm) gelatin
1/2 tablespoon (7½ ml) water
1 cup (8 fl oz/250 ml) heavy cream
Directions:
1.Pour the milk, vanilla, and salt into a heavy sauce pan. Place over medium-high heat and scald, bringing it to a near boiling point. Stir occasionally.


2.Meanwhile, in a stand mixer add the cornstarch and sugar. Whisk to combine

3.Add the eggs to the sugar and cornstarch and whisk until smooth.

4.When the milk is ready, gently and slowly while the stand mixer is whisking, pour the heated milk down the side of the bowl into the egg mixture.

5.Pour the mixture back into the warm pot and continue to cook over a medium heat until the custard is thick, just about to boil and coats the back of a spoon.

6.Remove from heat and pass through a fine mesh sieve into a large mixing bowl. Allow to cool for ten minutes stirring occasionally.

7.Cut the butter into four pieces and whisk into the pastry cream a piece at a time until smooth.

8.Cover the cream with plastic wrap, pressing the plastic wrap onto the top of the cream to prevent a skin from forming. Chill in the refrigerator for up to five days.

9.In a small dish, sprinkle the gelatin over the water and let stand for a few minutes to soften.

10.Put two inches (55 mm) of water into a small sauce pan and bring to a simmer over a medium heat.

11.Measure 1/4 cup (2 oz/60 ml) of the chilled pastry cream into a small stainless steel bowl that will sit across the sauce pan with the simmering water, without touching the water.

12.Heat the cream until it is 120 F (48.8 C). Add the gelatin and whisk until smooth. Remove from the water bath, and whisk the remaining cold pastry cream in to incorporate in two batches.

13.In a stand mixer, fitted with the whisk attachment, whip the cream until it holds medium-stiff peaks. Immediately fold the whipped cream into the pastry cream with a rubber spatula.

Simple Syrup:


gluten free and vegan!

You may choose to flavor the syrup. One way is to use flavored sugar (for example: apple cider sugar, orange sugar, or vanilla sugar) or to stir in 1-2 teaspoons of flavored extract. You may also infuse with herbs or spices, if desired or add four tablespoons (60 ml) of fruit juice or liqueur while the syrup is cooling.

Ingredients:
1/3 cup (2⅔ fl oz/80 ml) (2⅔ oz/75 gm) of sugar, flavored or white
1/3 cup (2⅔ fl oz/80 ml) of water

Directions:

1.Combine the water and sugar in a medium saucepan.

2.Bring the mixture to a boil and let the sugar dissolve. Stirring is not necessary, but will not harm the syrup.

3.Remove the syrup from the heat and cool slightly.

4.Transfer syrup to a lidded container or jar that can be stored in the refrigerator. Simple syrup can be stored for up to one month.

Fraisier Assembly:


Components:

1 baked 8 inch (20 cm) chiffon cake
1 recipe pastry cream filling
⅓ cup (80 ml) simple syrup or flavored syrup
2 lbs (900 g) strawberries
confectioners’ sugar for dusting
½ cup (120 ml) (5 oz/140 gm) almond paste

Directions:
1.Line the sides of a 8-inch (20 cm) spring form pan with plastic wrap. Do not line the bottom of the pan.

2.Cut the cake in half horizontally to form two layers.

3.Fit the bottom layer into the prepared spring form pan. Moisten the layer evenly with the simple syrup. When the cake has absorbed enough syrup to resemble a squishy sponge, you have enough.

4.Hull and slice in half enough strawberries to arrange around the sides of the cake pan. Place the cut side of the strawberry against the sides of the pan, point side up forming a ring.

5.Pipe cream in-between strawberries and a thin layer across the top of the cake.

6.Hull and quarter your remaining strawberries and place them in the middle of the cake. Cover the strawberries and entirely with the all but 1 tbsp. (15 ml) of the pastry cream.

7.Place the second cake layer on top and moisten with the simple syrup.

8.Lightly dust a work surface with confectioners' sugar and roll out the almond paste to a 10-inch (25 cm) round 1/16 inch (1.5 mm) thick. Spread the remaining 1 tablespoon (15 ml) of pastry cream on the top of the cake and cover with the round of almond paste.

9.Cover with plastic wrap and refrigerate for at least 4 hours.

10.To serve release the sides of the spring form pan and peel away the plastic wrap.

11.Serve immediately or store in the refrigerator for up to 3 days.


Enjoy!

Until we bake again...
.
Penny


Thursday, June 30, 2011

THE DARING BAKERS’ JUNE 2011 CHALLENGE: FROM PHYLLO TO BAKLAVA!!

I was very excited when I saw this challenge.  It seems my grandmother, (Sadie's  mom), used to make Phyllo for a romanian type of strudel she often made.  Phyllo, which means, "leaf" in Greek, is tissue paper-thin. Homemade phyllo is a lot of work to roll out but is worth it, its delicious! With Phyllo so readily available, one rarely sees it homemade anymore. The video link at the bottom of the page is very good as you can actually watch the technique used in rolling the dough.  It becomes so thin...it is actually transparent!
Baklava is quite simple to make but is a little time consuming.

Erica of Erica’s Edibles was our host for the Daring Baker’s June challenge. Erica challenged us to be truly DARING by making homemade phyllo dough and then to use that homemade dough to make Baklava.

Here is the  recipe for the dough
Phyllo Dough:

*Note 1: To have enough to fill a 9” x 9” baking dish with 18 layers of phyllo double this recipe.

*Note 2: Single recipe will fill a 8” x 5” baking dish.

*Note 3: Dough can be made a head of time and put in the freezer. Just remove from freezer and allow to thaw and continue making your baklava

Ingredients:

1 1/3 cups (320 ml) (185 gm/6½ oz) unbleached all purpose (plain) flour

1/8 teaspoon (2/3 ml) (¾ gm) salt

1/2 cup less 1 tablespoon (105 ml) water, plus more if needed

2 tablespoons (30 ml) vegetable oil, plus additional for coating the dough

1/2 teaspoon (2½ ml) cider vinegar, (could substitute white wine vinegar or red wine vinegar, but could affect the taste)

Directions:

1.In the bowl of your stand mixer combine flour and salt
2. Mix with paddle attachment
3. Combine water, oil and vinegar in a small bowl.

4. Add water & oil mixture with mixer on low speed, mix until you get a soft dough, if it appears dry add a little more water (I had to add a tablespoon more)
5. Change to the dough hook and let knead approximately 10 minutes. You will end up with beautiful smooth dough. If you are kneading by hand, knead approx. 20 minutes.

6. Remove the dough from mixer and continue to knead for 2 more minutes. Pick up the dough and through it down hard on the counter a few times during the kneading process.
7. Shape the dough into a ball and lightly cover with oil.


8. Wrap tightly in plastic wrap and let rest 30-90 minutes, longer is best ( I let mine rest 3 hours and it was very good)

Rolling your Phyllo

** Remove all rings and jewelry so it does not snag the dough**

Use whatever means you have to get the dough as thin as you can. I have included a fantastic video at the end of the post on how to roll out your phyllo dough, using a wooden dowel, which worked perfectly for me. You may also use a pasta machine if you have one, or a normal rolling pin whatever works for you.

1. Unwrap your dough and cut off a chunk slightly larger then a golf ball. While you are rolling be sure to keep the other dough covered so it doesn’t dry out
2. Be sure to flour your hands, rolling pin and counter. As you roll you will need to keep adding, don’t worry, you can’t over-flour.
3. Roll out the dough a bit to flatten it out.

Penny
4. Wrap the dough around your rolling pin/dowel
5. Roll back and forth quickly with the dough remaining on the dowel (see attached video for a visual, its much easier then it sounds)
6. Remove; and you will see how much bigger it is!
7.Rotate and repeat until it is as thin as you can it. Don’t worry if you get rips in the dough, as long as you have one perfect one for the top you will never notice.
8. When you get it as thin as you can with the rolling pin, carefully pick it up with well floured hands and stretch it on the backs of your hands as you would a pizza dough, just helps make it that much thinner. Roll out your dough until it is transparent. NOTE: you will not get it as thin as the frozen phyllo dough you purchase at the store, it is made by machine

9. Set aside on a well-floured surface. Repeat the process until your dough is used up. Between each sheet again flour well. You will not need to cover your dough with a wet cloth, as you do with boxed dough, it is moist enough that it will not dry out.


Baklava Recipe - Adapted from Alton Brown, The Food Network

Ingredients for the Filling:

1 (5-inch/125 mm piece) cinnamon stick, broken into 2 to 3 pieces or 2 teaspoons (10 ml) (8 gm) ground cinnamon

15 to 20 whole allspice berries ( I just used a few pinches)

3/4 cup (180 ml) (170 gm/6 oz) blanched almonds

3/4 cup (180 ml) (155 gm/5½ oz) raw or roasted walnuts

3/4 cup (180 ml) (140 gm/5 oz) raw or roasted pistachios

2/3 cup (160 ml) (150 gm/ 5 1/3 oz) sugar

1 cup (2 sticks) (240 ml) (225g/8 oz) melted butter ** You do not need this much
Directions:
1. Preheat oven to moderate 350°F/180°C/gas mark 4.
2. Combine nuts, sugar and spices in a food processor and pulse on high until finely chopped. If you do not have a food processor chop with a sharp knife as fine as you can. Set aside ( I forgot to put in the sugar and it was fine without it!)
3. Trim your phyllo sheets to fit in your pan.
4. Brush bottom of pan with butter and place first phyllo sheet


On the top layer, make sure you have a piece of phyllo with no holes if possible, just looks better.


7.Continue layering phyllo and buttering repeating 4 times
8. Sprinkle 1/3 of the nut mixture on top
9. Continue layering phyllo and buttering repeating 4 times
10. Sprinkle 1/3 of the nut mixture on top
11. Continue layering and buttering phyllo 5 more times. contimue on this manner. 


12. Once you have applied the top layer tuck in all the edges to give a nice appearance.

13. With a Sharp knife cut your baklava in desired shapes and number of pieces. If you can't cut all the ways through don’t worry you will cut again later.


 A 9x9 pan cuts nicely into 30 pieces. Then brush with a generous layer of butter making sure to cover every area and edge 12..
14. Bake for approximately 30 minutes; remove from oven and cut again this time all the way through. Continue baking for another 30 minutes. (Oven temperatures will vary, you are looking for the top to be a golden brown, take close watch yours may need more or less time in the oven)

When you put your baklava in the oven start making your syrup. When you combine the two, one of them needs to be hot, It is better when the baklava is hot and the syrup has cooled

For the syrup:
1 1/4 cups (300 ml) honey

1 1/4 cups (300ml) water

1 1/4 cups (300 ml) (280 gm/10 oz) sugar

1 cinnamon stick

1 (2-inch/50 mm) piece fresh citrus peel (lemon or orange work best)

a few cloves or a pinch or ground clove

Directions

1. Combine all ingredients in a medium pot over medium high heat. Stir occasionally until sugar has dissolved
2. Boil for 10 minutes, stir occasionally.

 Freezing/Storage Instructions/Tips: There are a few ways to store your Baklava. It is recommended that you store your baklava at room temperature in an airtight container. Stored at room temperature your baklava will last for up to 2 weeks. You will notice as the days pass it will get a little juicier and chewier. You may choose to store it in the fridge; this will make it a little harder and chewy, but does increase the shelf life. You can also freeze your baklava and then just set it out at room temperature to thaw.


When baklava is cooked remove from oven and pour the cooled (will still be warmish) syrup evenly over the top, taking care to cover all surfaces when pouring. It looks like it is a lot but over night the syrup will soak into the baklava creating a beautifully sweet and wonderfully textured baklava!

Leave at room temperature and cover well.Next morning all syrup is absorbed.


I think the Phyllo turned out quite well...
Things I would have changed...I  should have doubled the recipe as I really needed more layers in between the layers with the  filling. 
Overall it was pretty good...and surprisingly not as difficult to make as I had thought.

Until we bake again...
Related Posts Plugin for WordPress, Blogger...