Pages

Showing posts with label Daring Bakers. Show all posts

Friday, March 28, 2014

There's a Nougat in Town - The Daring Baker's Challenge March 2014


I am not going to lie, it is sticky and gooey to make....and a little sweet...ok more than a little, but really the nuts cut the sweetness!  Really!  Just eat a little bit at a time...
I think I actually love it.  And my friends do too.  And my colleagues...I saw you sneaking it, Flemming, Nancy and Robert.  And I heard you were sneaking it too Rick when I wasn't home.  Camera Guy told me.
So I was with my friends on our evening out to see Sandra Shamus, and went for dinner at Pi-Tom Thai Restaurant, next door to the Buddies in Bad Times Theatre. When I walked in, Pat commented that Leslie had let her have a piece of the nougat I had given her and she loved it.    In fact one day Leslie called me from the car, and told me she had to toss the little bag of nougat pieces to the back of the car because she couldn't stop having a piece or 2....  Well I had a bunch in my purse, and after dinner, pulled out my little baggie of these snow white treasures... and even though it probably wasn't exactly the proper thing to do in a restaurant,  I did pull it out - hey it's just candies - I never said I was a proper girl!  I was able to grab a quick photo before it vanished before my eyes...one for Patrice, one for Jane, one for Leslie, one for Pat and one for Ramona...oh yes, then one for me....then another round....ok and just one more....


The March 2014 Daring Bakers' challenge was hosted by Rebecca of BakeNQuilt. She challenged us to learn to make classic nougat and to make it our own with our choice of flavors and add-ins.

A little about Nougat 
Nougat is an aerated candy made from sugar, honey, egg whites and nuts. This type of nougat has
been around since the 16th century (according to Larousse Gastronomique). The most well known
nougats are the French Montélimar nougat and the Italian Torrone nougat.  Montélimar nougat
contains at least 30% nuts and includes pistachios as well as almonds. Italian Torrone and Spanish
Turrón are similar, typically containing almonds and sometimes other nuts. The cooking temperature and the quantity of sugar determines the texture of the finished product. Nougat can be chewy, soft and tender to hard and brittle


Here is the recipe: 
I need to emphasize 2 important items - a good candy thermometer and  edible paper (wafer paper) 
I found the edible paper at the bulk barn in a corner...hidden...and it is important because parchment would stick too much.

 Ingredients
4 sheets edible wafer paper, 8x11 inches (20x28 cm)  It is optional but I think VERY necessary
 

For the Meringue:

2 large egg whites, at room temperature
¼ cup (60 ml) (50 gm) (1¾ oz) granulated sugar
½ teaspoon (3 gm) cream of tartar
 

For the Syrup:
1½ cups (360 ml) (500 gm) (18 oz) honey (preferably light in color and flavor)
3 cups (720 ml) ( 600 gm) (21 oz) granulated sugar
½ cup (120 ml) (170 gm) (6 oz) light corn syrup
½ cup (120 ml) water
1 vanilla bean, split and scraped 
(Thank you Carl for the vanilla you brought me from Tahiti!)


Add -ins:
2 tablespoons (30 ml) (25 gm) (1 oz) cocoa butter, melted (see Recipe Notes)
5 cups (1.2 litre) (680 gm) (24 oz)  mixture of  toasted whole unblanched almonds and pistachio nuts (don't toast the pistachio nuts)
 

Recipe Notes:
Edible wafer paper is nice to have if you’re giving nougat as gifts as it helps with the stickiness issue.
However, it’s not essential. If you can’t find it, grease the pan and then line it with parchment paper.
Grease the parchment as well.


Fat (cocoa butter in this case) is added to nougat to give it a shorter texture and cleaner bite.  The recipe will still be good without it- just chewier. Any fat added to nougat should be one that is solid at room temperature. 
Directions
Place the toasted almonds and pistachios in a heat safe bowl and put in an oven at 250°F until needed.
Line the bottom of a 9x13 inch (23x33 cm) pan with wafer paper, cutting it to fit. You can put
plastic wrap or parchment under the wafer paper just for extra insurance  to get the nougat out of the pan.   You won't be putting this pan in the oven...

Combine the egg whites, sugar and cream of tartar for the meringue in a 4.5 or 5 quart
(about 5 litre) mixer bowl fitted with a whip attachment but do not begin whipping.
Heat the honey in a small saucepan or in the microwave until nearly boiling
Combine the remaining ingredients for the syrup (sugar, corn syrup, water and vanilla bean)
in a 2 quart (2 litre) saucepan.
Bring the sugar mixture to a boil and then lower the heat and boil for 3 minutes, covered.
Remove the lid and attach the candy thermometer. Continue to cook uncovered on high heat without stirring until the syrup reaches 290°F
 When the sugar mixture reaches 290°F , start whipping the egg whites on high speed and move the sugar mixture off the heat.
Slowly pour the heated honey into the sugar mixture. The mixture will foam up initially.
Put the pan back on the heat and continue cooking until the mixture again reaches 290°F

Remove from the heat and use tongs to take out the vanilla bean pods.
Slowly pour the hot syrup into the whipping whites by letting it run down the inside of the
mixer bowl. Don’t pour it directly on the whites or they may collapse.
Add the cocoa butter and whip JUST until the mixture is smooth again. Do not over mix. If
you have a 4.5 quart (4.5 litre) mixer like I do, you may need to initially lower the speed of the mixer while pouring in the cocoa butter as it will try to slop out. 
Remove the bowl from the mixer and dump in the hot nuts from the oven. Mix quickly with a
heat- safe spatula until the almonds are evenly distributed

Immediately pour the hot nougat into the prepared pan, on top of the wafer paper. 


Cover the top of the nougat with more wafer paper and press to smooth and even out the nougat.


Let the nougat cool at room temperature until just warm to the touch, about 45 minutes. Don’t let it go too long or it will be very difficult to get out of the pan and difficult to cut. You
want it to still be a little flexible when you remove it but not so soft that it loses its shape.
Pry the nougat out of the pan with a spatula and dump it out onto a cutting board. Trim the
edges and cut the nougat with an oiled knife into the size pieces you want. 
Wrap the nougat individually or store at room temperature in an airtight container. The
texture of the nougat will soften a bit after a few days, especially if you have added dried fruits in with the nuts.
There is one person who may not have loved it...but that's ok....Camera Guy... 
xxx
Until we bake again
Penny

Sunday, May 27, 2012

May 2012 Daring Bakers' Challenge....Challah


May’s Daring Bakers’ Challenge was pretty twisted – Ruth from The Crafts of Mommyhood challenged us to make challah! Using recipes from all over, and tips from “A Taste of Challah,” by Tamar Ansh, she encouraged us to bake beautifully braided breads.

And we did!  I love making Challah...it looks beautiful and is delicious.  I would say one of my favourites is Peter Reinhart's- from either the Bread Baker's Apprentice or Artisan Breads Everyday -  I was a recipe tester for that book so it is very special to me!

I keep on trying different recipes though, just to see the differences and I  just bought a new book called 
Inside the Jewish Bakery: Recipes and Memories from the Golden Age of Jewish Baking. 
I bought it at the Cookbook Store  in downtown Toronto.  This really is my go-to store for cookbooks and is an independantly owned store so I encourage you to go check it out if you live in Toronto or are visiting the city!


It really has some great stories about the history of Jewish baking.   I wouldn't recommend it to a novice baker though, as it often skips steps and assumes you are familiar with the process.  I made the Challah and it was very good.  I also made the Double Knot Rolls which we used as hamburger buns and they were amazing! The combination of  Camera Guy's fabulous hamburgers and these buns  was the best!  I will post about them another time, but you can use the same dough you use for the Challah/egg bread.
Here is a photo of the rolls:


I didn't use the following recipe that Ruth suggested for this challenge as I have my favourites above, but other Daring Bakers loved it, so I wanted to share it with you.

In July, Elliot (my son) and his girlfriend Leah are coming to Toronto to visit.  I can't wait!   I think I will have to make...Challah...French toast...buns..and so the list begins....


Enjoy!
Until we bake again...
Penny


Here is the recipe:

Challah (Honey White)

(from Tammy’s Recipes)
Servings: 2 loaves
Ingredients
1 ½ cups (360 ml) warm water, separated
1 Tbsp. (15 ml) (15 gm/½ oz sugar
2 Tbsp. (2-2/3 packets) (30 ml) (18 gm) (2/3 oz) dry active yeast
½ cup (120 ml) honey
1 Tbsp. (15 ml) oil (light colored vegetable oil, or olive oil if you prefer)
4 large eggs
1 ½ tsp. 7½ ml) (9 gm) (1/3 oz) salt
5 cups (1200 ml) (700 gm/25 oz) all-purpose (plain) flour, plus more as needed (up to 8 or 9 cups total)

1 egg beaten with 1 tsp. water
Directions:
1. In mixer bowl/large mixing bowl combine ½ cup warm water, 1 Tbsp. sugar and 2 Tbsp. yeast. Allow to proof approximately 5 minutes until foamy.
2. To the yeast mixture add the remaining water, honey, oil, eggs, salt and 5 cups of flour. Knead (by hand or with your mixer’s dough hook) until smooth, adding flour as needed. Knead for approximately 10 minutes.
3. Transfer dough to a clean, oiled bowl, turn to coat or add a bit more oil on top. Cover bowl with a kitchen/tea towel. Leave to rise in a warm place until doubled, about 1 ½ hours.
4. Punch down the dough, divide it into two sections. Use one half to make each loaf (shaped or braided as desired).
5. Place loaves on parchment lined or greased baking sheets, cover with a towel, allow to rise 30 minutes.
6. Preheat oven to 325 degrees.
7. Brush tops loaves with egg wash. (Sprinkle with seeds or toppings here if wanted.)
8. Bake loaves 30-40 minutes until done.
9. Cool on wire racks.


Tuesday, February 28, 2012

My Chocolate Banana Peanut Butter Loaf Ain't Your Mother's Banana Bread


The February Daring Baker's Challenge

 
I rarely have bananas left over but I had a few bananas the other day that were quite ripe.  They were perfect for the banana bread I was planning to make for this month's Daring Baker's Challenge!  Camera Guy doesn't like ripe bananas...not even close to ripe bananas...he won't touch them.....so why I ask did he eat them? YES HE ATE THEM!!!! Ok, he left one, but that isn't enough for this banana bread.  It really is not easy to find ripe bananas in the store and so my friend Meredith brought me a couple of ripe bananas she had in the freezer - yes you can freeze ripe bananas. Thank you Meredith!   They get a little watery but that's ok because the loaf is quite forgiving, which is why I added chunks of chocolate and a couple of tablespoons of peanut butter...I am drooling thinking about it....

The Daring Bakers’ February 2012 host was – Lis! Lisa stepped in last minute and challenged us to create a quick bread we could call our own. She supplied us with a base recipe and shared some recipes she loves from various websites and encouraged us to build upon them and create new flavor profiles.

One of the conditions for this month's challenge was that it had to be made realtively quickly - about 1.5 hours.   This one is very easy...


Starring our ingredients! (the frozen bananas are in the plastic bag)


In one bowl add butter, eggs, sugar, peanut butter and ripe bananas. 


In another bowl combine the dry ingredients...


Add the dry ingredients to the wet ingredients.


And add the chocolate or chocolate chips (only if you want)... then pour into a greased loaf pan.
I forgot to take a picture of that....ooops.....

Bake and voila! 

Camera Guy smelled it and oooohed and ahhhed and then he tasted it and oohed and ahhhed a lttle louder...He liked it.

Until we bake again....
Penny

_______________________________________________________________________
Here is the recipe: Adapted from one of my favourite bread blogs - The Fresh Loaf

Makes 1 full-sized loaf or 2 small loaves

Preheat the oven to 350 degrees.

In one bowl, combine:
  • 1/2 stick (4-5 tablespoons) butter, softened
  • 2 eggs
  • 2 or 3 very ripe bananas
  • 2/3 cup sugar
  • 2 large tablespoons Peanut butter
Use a potato masher, fork, or spoon to squish the banana and mix the ingredients together.

In another bowl, combine:

  • 1 1/3 cup all-purpose unbleached flour
  • 3/4 teaspoon salt
  • 1/2 teaspoon baking soda
  • 1/4 teaspoon baking powder
  • 1/2 teaspoon cinnamon (optional)

Combine the wet and dry ingredients and mix until the ingredients are blended together.

  • 1/2 cup of chunks of chocolate ( I used a dark chocolate bar)

This is where I added the chocolate...If you like, stir in additional ingredients here, such as chopped walnuts or pecans, dried cherries or apricots, or chocolate chips. A handful is good.

Pour the dough into greased baking pans and bake until a toothpick inserted in the center comes out clean.

Small loaves take around 30 minutes, and  normal-sized loaves take around 50 minutes.
Remove from the oven.
It is really tasty warm especially  with the chocolate in that melty state....I am drooling again....
Cool in the pan for about 15 minutes.  Once they are cool they can be individually wrapped and frozen.

Enjoy!

Friday, January 27, 2012

The Daring Baker's Scones...in search of the best!


When Camera Guy and I visited England and Scotland in July, we got into the habit of having afternoon scones. Oh yes...we were "Sconeheads"   And I mean we had the whole works- clotted cream, butter, jam and some wonderful tea for the finishing touch....  Each afternoon, he would mention " Isn't it time we stopped somewhere for scones?"  We considered ourselves experts, rating scones wherever we went- The Isle of Skye serving up the best ...but they would not share the recipe... too bad, because they were really good.   We actually had to end this foolishness when I started having difficulty fitting in the car!


And so we declared that every Sunday when we returned home to Canada,  we would have scones... We actually enjoyed this every Sunday for a month or so and then we moved and that is another story (Moving is not fun!)

The Daring Baker's challenge this month is scones!

Audax Artifex was our January 2012 Daring Bakers’ host.. Aud worked tirelessly to master light and fluffy scones (a/k/a biscuits) to help us create delicious and perfect batches in our own kitchens!


Basic scones (a.k.a. Basic Biscuits)
Starring our fabulous ingredients

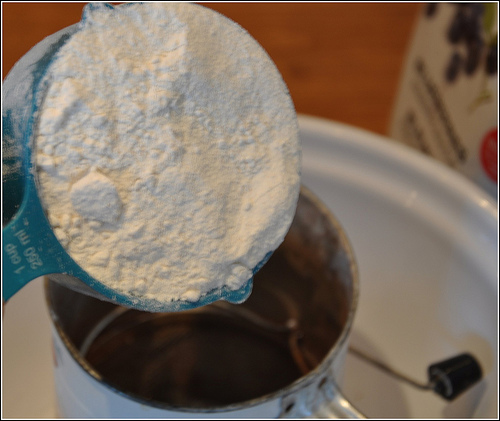
Add Flour to the sifter over a big bowl


Then Baking Powder


And Salt

Sift 3 times (I must confess - I only sifted once)

Introducing Graeta !  Grate frozen butter....


Doesn't she look proud?  We bought her in Vienna.

Rub in the Butter with your fingertips until  it looks like coarse bread crumbs

Add the blueberries and 1 tbsp sugar
then add the milk until a sticky dough

Pat into a rectangle 6 x4 inches


Cut out scones  (Biscuits) - I had a square cutter

Place on cookie sheet - just touching... so cute!

Bake and serve warm....

with homemade jam...I called this Strawberry Fields Forever...

So you may be saying- but they are blueberry scones why strawberry jam?  Because - who cares?  Warm scones, butter and jam - any jam! ...simply delightful.
I am going to surprise Camera Guy with breakfast in bed!
He ate four!....He really does love my baking.


Thanks again Audax for hosting this month!  
Until we bake again...
Penny


Here is the recipe:
Starring- in order of Appearance!


Servings: about eight 2-inch (5 cm) scones or five 3-inch (7½ cm) scones
The recipe can be doubled:
  • 1 cup (240 ml) (140 gm/5 oz) plain (all-purpose) flour

  • 2 teaspoons (10 ml) (10 gm) (1/3 oz) fresh baking powder

  • ¼ teaspoon (1¼ ml) (1½ gm) salt

  • 4 tablespoons (30 gm/1 oz) frozen grated butter (or a combination of crisco and butter)  

  • 1/4 cup dried Blueberries (or strawberries or raisins etc) (45 gm)

  • Approximately ½ cup (120 ml) cold buttermilk

  • 1 Tablespoon sugar (15 gm)

  • Optional 1 tablespoon milk, for glazing the tops of the scones

Directions:

1. Preheat oven to very hot 475°F/240°C/gas mark 9.


2. Triple sift the dry ingredients into a large bowl. (If your room temperature is very hot

refrigerate the sifted ingredients until cold.)


3. Rub the frozen grated butter (or combination of fats) into the dry ingredients until it resembles

very coarse bread crumbs with some pea-sized pieces if you want flaky scones or until it

resembles coarse beach sand if you want tender scones.


3A. Add the dried fruit and 1 tablespoon sugar


4. Add nearly all of the liquid at once into the rubbed-in flour/fat mixture and mix until it just

forms a sticky dough (add the remaining liquid if needed). The wetter the dough the lighter

the scones (biscuits) will be!


5. Turn the dough out onto a lightly floured board, lightly flour the top of the dough. To achieve

an even homogeneous crumb to your scones knead very gently about 4 or 5 times (do not

press too firmly) the dough until it is smooth. To achieve a layered effect in your scones knead

very gently once (do not press too firmly) then fold and turn the kneaded dough about 3 or 4

times until the dough has formed a smooth texture. (Use a floured plastic scraper to help you

knead and/or fold and turn the dough if you wish.)


6. Pat or roll out the dough into a 6 inch by 4 inch rectangle by about ¾ inch thick (15¼ cm by 10

cm by 2 cm thick). Using a well-floured 2-inch (5 cm) scone cutter (biscuit cutter), stamp out

without twisting six 2-inch (5 cm) rounds, gently reform the scraps into another ¾ inch (2 cm)

layer and cut two more scones (these two scones will not raise as well as the others since the

extra handling will slightly toughen the dough).  Or use a well-floured sharp knife to form

squares or wedges as you desire.


7. Place the rounds just touching on a baking dish if you wish to have soft-sided scones or place

the rounds spaced widely apart on the baking dish if you wish to have crisp-sided scones.

Glaze the tops with milk if you want a golden colour on your scones or lightly flour if you

want a more traditional look to your scones.


8. Bake in the preheated very hot oven for about 10 minutes  (check at 8 minutes since home

ovens at these high temperatures are very unreliable) until the scones are well risen and are

lightly coloured on the tops. The scones are ready when the sides are set.


9. Immediately place onto cooling rack to stop the cooking process, serve while still warm.


Variations on the Basic recipe

Cheese and Chive – follow the Basic recipe above but add ¼ teaspoon of baking soda, after Step 2 add

½ teaspoon sifted mustard powder, ¼ teaspoon sifted cayenne pepper (optional), ½ cup (60 gm/2 oz)

grated cheese and 2 tablespoons finely chopped chives into the sifted ingredients, in Step 3 aim of

beach sand sized pieces of fat coated in flour, in Step 5 knead the dough, rounds are widely spaced in

the baking dish, sprinkle the rounds with cracked pepper.


Storage & Freezing Instructions/Tips:

Scones are best eaten warm. Scones (biscuits) are really easy to store – bag the cooked and cooled scones and freeze until needed then reheat in a moderate hot for a few minutes.


Monday, May 23, 2011

Happy Victoria Day!


The first long weekend of the year and we enjoyed it with friends.  The first summer BBQ - dinner outside at Jim and Leslie's was a celebration of summer and all things ONTARIO!  Jim has a smoker and yesterday smoked a delicious lamb -superbly done...Leslie made asparagus wrapped in bacon and even the bacon was Ontario...Ontario wild leeks....potatoes and more.  Well, maybe the "Best Shrimp in the World" wasn't from Ontario but it lived up to it's name.  Even the macarons were from Ontario.  We made them once in a Daring Baker's challenge and I must make them again!

Baking has been put on the back burner right now because we are selling our house and the Real Esate Agent has asked us to remove any signs of life from our kitchen...to show off the space...how sad is that?

So here I am, the other love of my life, flour, (Camera guy is ok with this)  is nowhere in sight...butter...no need...She wanted me to remove my mixer but I refused.  I placed it on a lower shelf, so I can look at it knowing that it is still close by and when I am in the kitchen,  I can run my hands along it's tangerine body and reflect on the good times. 

It is at times like this that I wish for my Mom's chocolate cake.  It's easy and delicious...try it - and send me some?

To my Canadian friends and family,  Happy Victoria Day!

Until we bake again....
Penny

Thursday, December 23, 2010

Christmas Stollen - My Daring Baker's Challenge!

As I  started writing about this month's challenge...I started thinking back to the beginning of my blog.  It started in 2008 after I met Ivonne of Cream Puffs in Venice, one of the founders of the Daring Bakers, in my baking class at George Brown College in Toronto. She told me about her blog and I was so impressed I decided to join the Daring Bakers and start blogging myself.  For over 2 years I have been pretty dedicated each month completing the challenges and yes... I may have missed one or two in that time...and yes there have been failures...

This month I have the honour of hosting the Daring Baker’s Challenge and I chose Stollen. I was so excited and very nervous when I was deciding on my recipe…would the Daring Bakers like it? Find it challenging enough? And so on. I think my friends thought it was all I wanted to talk about ...I drove them crazy....thank you  for putting up with me!

Well it has been soooo much fun! The baking community of the Daring Bakers spans the globe. They bake under different conditions – temperature, humidity and all the things that influence the results of a baked product. We have a Daring Bakers forum – kind of like a virtual kitchen where we share our results – the good, the bad and the ugly – and I have been so impressed with the creativity and funny stories. We even had a stollen stolen by a pet and a student who baked it in a toaster oven and enjoyed it while studying for her exams. The stollens were decorated in amazing ways. Ingredients were substituted because of allergies (gluten free, nuts) and some ingredients not loved by some – candied fruits and raisins....were omitted and replaced by new ingredients....but they still did the challenge! We are a pretty dedicated bunch of bakers! Please take a moment and look at some of my fellow Daring Bakers blogs...

Monika is  the sister of my friend and colleague Melanie, and she sent me her Stollen recipe, a German tradition in their household. I tweaked it and then Audax, my Daring Baker friend (DBF!) in Australia, helped me test it and we tweaked it more. We added lots of hints and even made our own candied peels as well as changing the shape into a wreath –so we didn’t stay totally with tradition..... but the results have been unbelievable with most DB's thrilled! 

Thank you Liz of La Mia Cucina and Ivonne for your hard work with the Daring Bakers and thanks Audax for all your help and always being there – not only with hints about the recipes but reminding me that it should always be fun!

Now I am proud to say my official Blog statement:
The 2010 December Daring Bakers’ challenge was hosted by Penny of Sweet Sadie’s Baking. She chose to challenge Daring Bakers’ to make Stollen. She adapted a friend’s family recipe and combined it with information from friends, techniques from Peter Reinhart’s book.........and a Martha Stewart demonstration.


Stollen is a bread-like fruitcake made with yeast, water and flour, and usually with zest added to the dough. Candied orange peel and candied citrus are often also added.  Over the centuries, the cake changed from being a simple, fairly tasteless "bread" to a sweeter cakelike bread  with richer ingredients. The Advent season was a time of fasting, and bakers were not allowed to use butter, only oil, and the cake was tasteless and hard, but this has changed and we definitely use butter!
You can watch this little video from Martha Stewart where she demonstrated (along with her mother) a stollen in a wreath design.

Click here for the printable recipe!

For more bread recipes and info, check out Yeastspotting.

I wish you all  a very happy holiday season and a healthy and joyful New Year!
Big Christmas hugs to all!

Until we bake again...
Penny


Related Posts Plugin for WordPress, Blogger...