Pages

Showing posts with label blueberry. Show all posts

Saturday, April 18, 2020

MOTHER ANDREW'S SCONE/TEA BISCUITS


Biscuit Bitch is a great little spot in Seattle.  See the note at the bottom of the page to hear more about it.


And the baking continues....
Memories of baked goods from our friends and family give  us comfort and these days any extra comfort we can get is good.   After my last post I received this recipe from Sandra, who is one of the travel agents I work with at The Travel Agent Next Door. This is her grandmother's recipe for scones or some call them tea biscuits. 


  Sandra's grandmother Flora with her Grandfather David


"We called her “Mother”. All the family, grandkids and friends & neighbours did. She was born, raised and lived in Newfoundland so a true Newfie."  Now both of Sandra's parents live with them (mom(81) & dad (93)).  


 Here is Sandra's mom with her grandmother

I love when we can pass these recipes on.  I made these blueberry scones/biscuits  today and they really are deeeeelicious- especially warm! 

Sandra doubles the recipe and then freezes them.


3 Cups Flour
6 Tsp Baking Powder
½ Cup Sugar
Rind of one Lemon
1 Cup Butter (cut in pieces and put in the freezer for about 10-15 mins )
1 Egg
1 Tsp Vanilla
1 Pint Blueberries (fresh) (a little over 1 cup)
1 Cup Milk

Preheat oven to 375 degrees.

Wash your hands!!!!
Mix Flour, Baking Powder and Sugar together. Whisk to mix.


Add finely grated rind of one lemon.
Cut in the butter to the dry mix.  You can either use a pastry tool like this one but I often just use my finger tips.  This is a very important step so do not incorporate the butter too much!  It should be little pieces.


Add Blueberries and mix.


Mix in a smaller bowl  the Egg, Vanilla and 1 cup of milk.


Add wet mixture to the dry mixture a little at a time. Don’t overmix. 


Grease a cookie sheet  or line with parchment paper. Drop large spoonfuls on a cookie sheet .


Bake at 375 for 20 minutes.They should be golden.
Cool on the cookie sheet for about 10 minutes before lifting off.

This should make about  1.5 dozen, but it depends on the sizes of the scones:)


Notes:
Substitute with raisins if you want. If you do then the batter will be much drier and you can use a cookie cutter to cut out the scones.   The recipe with the fresh blueberries was really good.

Hope you enjoy them!  Dan gobbled them up!
Thank you Sandra!!!

Until we bake again
Stay healthy and keep at a distance!
Penny

From their site...
A place where you can get a kick-ass local espresso and order a comforting meal while getting to say the word “bitch” over and over… and over. Don’t worry if your face turns red, we might tease you a bit, but we’ll laugh with you! Our music will be upbeat and usually oldies, motown or southern rock because we’re a little bit trailer trash too. But even if there’s a long line you can watch our staff dance to the beat in our tiny kitchen all the while flipping your eggs and calling out the orders. The ambiance is kitschy- the energy palpable. This is a place to put a smile on your face, because even if it’s not, it feels like it could easily be home.



Friday, January 27, 2012

The Daring Baker's Scones...in search of the best!


When Camera Guy and I visited England and Scotland in July, we got into the habit of having afternoon scones. Oh yes...we were "Sconeheads"   And I mean we had the whole works- clotted cream, butter, jam and some wonderful tea for the finishing touch....  Each afternoon, he would mention " Isn't it time we stopped somewhere for scones?"  We considered ourselves experts, rating scones wherever we went- The Isle of Skye serving up the best ...but they would not share the recipe... too bad, because they were really good.   We actually had to end this foolishness when I started having difficulty fitting in the car!


And so we declared that every Sunday when we returned home to Canada,  we would have scones... We actually enjoyed this every Sunday for a month or so and then we moved and that is another story (Moving is not fun!)

The Daring Baker's challenge this month is scones!

Audax Artifex was our January 2012 Daring Bakers’ host.. Aud worked tirelessly to master light and fluffy scones (a/k/a biscuits) to help us create delicious and perfect batches in our own kitchens!


Basic scones (a.k.a. Basic Biscuits)
Starring our fabulous ingredients

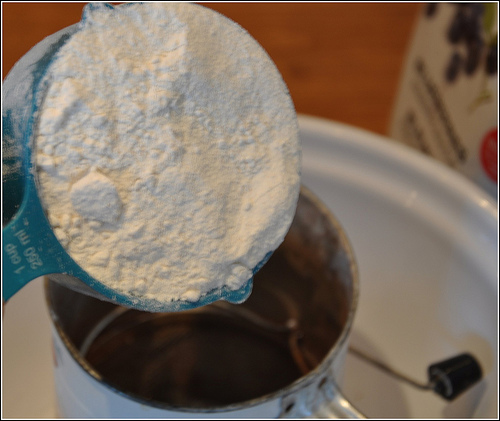
Add Flour to the sifter over a big bowl


Then Baking Powder


And Salt

Sift 3 times (I must confess - I only sifted once)

Introducing Graeta !  Grate frozen butter....


Doesn't she look proud?  We bought her in Vienna.

Rub in the Butter with your fingertips until  it looks like coarse bread crumbs

Add the blueberries and 1 tbsp sugar
then add the milk until a sticky dough

Pat into a rectangle 6 x4 inches


Cut out scones  (Biscuits) - I had a square cutter

Place on cookie sheet - just touching... so cute!

Bake and serve warm....

with homemade jam...I called this Strawberry Fields Forever...

So you may be saying- but they are blueberry scones why strawberry jam?  Because - who cares?  Warm scones, butter and jam - any jam! ...simply delightful.
I am going to surprise Camera Guy with breakfast in bed!
He ate four!....He really does love my baking.


Thanks again Audax for hosting this month!  
Until we bake again...
Penny


Here is the recipe:
Starring- in order of Appearance!


Servings: about eight 2-inch (5 cm) scones or five 3-inch (7½ cm) scones
The recipe can be doubled:
  • 1 cup (240 ml) (140 gm/5 oz) plain (all-purpose) flour

  • 2 teaspoons (10 ml) (10 gm) (1/3 oz) fresh baking powder

  • ¼ teaspoon (1¼ ml) (1½ gm) salt

  • 4 tablespoons (30 gm/1 oz) frozen grated butter (or a combination of crisco and butter)  

  • 1/4 cup dried Blueberries (or strawberries or raisins etc) (45 gm)

  • Approximately ½ cup (120 ml) cold buttermilk

  • 1 Tablespoon sugar (15 gm)

  • Optional 1 tablespoon milk, for glazing the tops of the scones

Directions:

1. Preheat oven to very hot 475°F/240°C/gas mark 9.


2. Triple sift the dry ingredients into a large bowl. (If your room temperature is very hot

refrigerate the sifted ingredients until cold.)


3. Rub the frozen grated butter (or combination of fats) into the dry ingredients until it resembles

very coarse bread crumbs with some pea-sized pieces if you want flaky scones or until it

resembles coarse beach sand if you want tender scones.


3A. Add the dried fruit and 1 tablespoon sugar


4. Add nearly all of the liquid at once into the rubbed-in flour/fat mixture and mix until it just

forms a sticky dough (add the remaining liquid if needed). The wetter the dough the lighter

the scones (biscuits) will be!


5. Turn the dough out onto a lightly floured board, lightly flour the top of the dough. To achieve

an even homogeneous crumb to your scones knead very gently about 4 or 5 times (do not

press too firmly) the dough until it is smooth. To achieve a layered effect in your scones knead

very gently once (do not press too firmly) then fold and turn the kneaded dough about 3 or 4

times until the dough has formed a smooth texture. (Use a floured plastic scraper to help you

knead and/or fold and turn the dough if you wish.)


6. Pat or roll out the dough into a 6 inch by 4 inch rectangle by about ¾ inch thick (15¼ cm by 10

cm by 2 cm thick). Using a well-floured 2-inch (5 cm) scone cutter (biscuit cutter), stamp out

without twisting six 2-inch (5 cm) rounds, gently reform the scraps into another ¾ inch (2 cm)

layer and cut two more scones (these two scones will not raise as well as the others since the

extra handling will slightly toughen the dough).  Or use a well-floured sharp knife to form

squares or wedges as you desire.


7. Place the rounds just touching on a baking dish if you wish to have soft-sided scones or place

the rounds spaced widely apart on the baking dish if you wish to have crisp-sided scones.

Glaze the tops with milk if you want a golden colour on your scones or lightly flour if you

want a more traditional look to your scones.


8. Bake in the preheated very hot oven for about 10 minutes  (check at 8 minutes since home

ovens at these high temperatures are very unreliable) until the scones are well risen and are

lightly coloured on the tops. The scones are ready when the sides are set.


9. Immediately place onto cooling rack to stop the cooking process, serve while still warm.


Variations on the Basic recipe

Cheese and Chive – follow the Basic recipe above but add ¼ teaspoon of baking soda, after Step 2 add

½ teaspoon sifted mustard powder, ¼ teaspoon sifted cayenne pepper (optional), ½ cup (60 gm/2 oz)

grated cheese and 2 tablespoons finely chopped chives into the sifted ingredients, in Step 3 aim of

beach sand sized pieces of fat coated in flour, in Step 5 knead the dough, rounds are widely spaced in

the baking dish, sprinkle the rounds with cracked pepper.


Storage & Freezing Instructions/Tips:

Scones are best eaten warm. Scones (biscuits) are really easy to store – bag the cooked and cooled scones and freeze until needed then reheat in a moderate hot for a few minutes.


Related Posts Plugin for WordPress, Blogger...