
When Camera Guy and I visited England and Scotland in July, we got into the habit of having afternoon scones. Oh yes...we were "Sconeheads" And I mean we had the whole works- clotted cream, butter, jam and some wonderful tea for the finishing touch.... Each afternoon, he would mention " Isn't it time we stopped somewhere for scones?" We considered ourselves experts, rating scones wherever we went- The Isle of Skye serving up the best ...but they would not share the recipe... too bad, because they were really good. We actually had to end this foolishness when I started having difficulty fitting in the car!
And so we declared that every Sunday when we returned home to Canada, we would have scones... We actually enjoyed this every Sunday for a month or so and then we moved and that is another story (Moving is not fun!)
The Daring Baker's challenge this month is scones!
Audax Artifex was our January 2012 Daring Bakers’ host.. Aud worked tirelessly to master light and fluffy scones (a/k/a biscuits) to help us create delicious and perfect batches in our own kitchens!
Basic scones (a.k.a. Basic Biscuits)
So you may be saying- but they are blueberry scones why strawberry jam? Because - who cares? Warm scones, butter and jam - any jam! ...simply delightful.
I am going to surprise Camera Guy with breakfast in bed!
He ate four!....He really does love my baking.
Thanks again Audax for hosting this month!
Until we bake again...
Penny
Here is the recipe:
Starring- in order of Appearance!
Servings: about eight 2-inch (5 cm) scones or five 3-inch (7½ cm) scones
The recipe can be doubled:
Directions:
1. Preheat oven to very hot 475°F/240°C/gas mark 9.
2. Triple sift the dry ingredients into a large bowl. (If your room temperature is very hot
refrigerate the sifted ingredients until cold.)
3. Rub the frozen grated butter (or combination of fats) into the dry ingredients until it resembles
very coarse bread crumbs with some pea-sized pieces if you want flaky scones or until it
resembles coarse beach sand if you want tender scones.
3A. Add the dried fruit and 1 tablespoon sugar
4. Add nearly all of the liquid at once into the rubbed-in flour/fat mixture and mix until it just
forms a sticky dough (add the remaining liquid if needed). The wetter the dough the lighter
the scones (biscuits) will be!
5. Turn the dough out onto a lightly floured board, lightly flour the top of the dough. To achieve
an even homogeneous crumb to your scones knead very gently about 4 or 5 times (do not
press too firmly) the dough until it is smooth. To achieve a layered effect in your scones knead
very gently once (do not press too firmly) then fold and turn the kneaded dough about 3 or 4
times until the dough has formed a smooth texture. (Use a floured plastic scraper to help you
knead and/or fold and turn the dough if you wish.)
6. Pat or roll out the dough into a 6 inch by 4 inch rectangle by about ¾ inch thick (15¼ cm by 10
cm by 2 cm thick). Using a well-floured 2-inch (5 cm) scone cutter (biscuit cutter), stamp out
without twisting six 2-inch (5 cm) rounds, gently reform the scraps into another ¾ inch (2 cm)
layer and cut two more scones (these two scones will not raise as well as the others since the
extra handling will slightly toughen the dough). Or use a well-floured sharp knife to form
squares or wedges as you desire.
7. Place the rounds just touching on a baking dish if you wish to have soft-sided scones or place
the rounds spaced widely apart on the baking dish if you wish to have crisp-sided scones.
Glaze the tops with milk if you want a golden colour on your scones or lightly flour if you
want a more traditional look to your scones.
8. Bake in the preheated very hot oven for about 10 minutes (check at 8 minutes since home
ovens at these high temperatures are very unreliable) until the scones are well risen and are
lightly coloured on the tops. The scones are ready when the sides are set.
9. Immediately place onto cooling rack to stop the cooking process, serve while still warm.
Variations on the Basic recipe
Cheese and Chive – follow the Basic recipe above but add ¼ teaspoon of baking soda, after Step 2 add
½ teaspoon sifted mustard powder, ¼ teaspoon sifted cayenne pepper (optional), ½ cup (60 gm/2 oz)
grated cheese and 2 tablespoons finely chopped chives into the sifted ingredients, in Step 3 aim of
beach sand sized pieces of fat coated in flour, in Step 5 knead the dough, rounds are widely spaced in
the baking dish, sprinkle the rounds with cracked pepper.
Storage & Freezing Instructions/Tips:
Scones are best eaten warm. Scones (biscuits) are really easy to store – bag the cooked and cooled scones and freeze until needed then reheat in a moderate hot for a few minutes.
Audax Artifex was our January 2012 Daring Bakers’ host.. Aud worked tirelessly to master light and fluffy scones (a/k/a biscuits) to help us create delicious and perfect batches in our own kitchens!
Basic scones (a.k.a. Basic Biscuits)
 |
| Starring our fabulous ingredients |
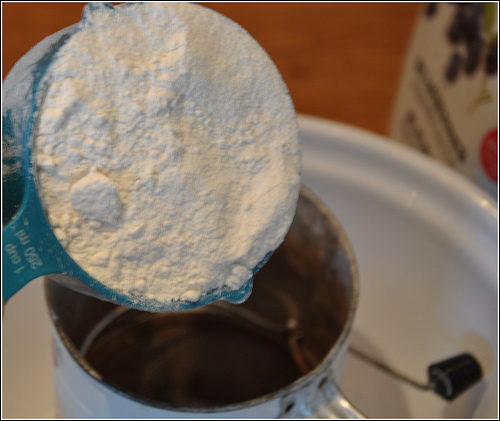 |
| Add Flour to the sifter over a big bowl |
 |
| Then Baking Powder |
 |
| And Salt |
 |
| Sift 3 times (I must confess - I only sifted once) |
 |
| Introducing Graeta ! Grate frozen butter.... |
 |
| Doesn't she look proud? We bought her in Vienna. |
 |
| Rub in the Butter with your fingertips until it looks like coarse bread crumbs |
 |
| Add the blueberries and 1 tbsp sugar then add the milk until a sticky dough |
 |
| Pat into a rectangle 6 x4 inches |
 |
Cut out scones (Biscuits) - I had a square cutter |
 |
| Place on cookie sheet - just touching... so cute! |
 |
| Bake and serve warm.... |
 |
| with homemade jam...I called this Strawberry Fields Forever... |
So you may be saying- but they are blueberry scones why strawberry jam? Because - who cares? Warm scones, butter and jam - any jam! ...simply delightful.
I am going to surprise Camera Guy with breakfast in bed!
He ate four!....He really does love my baking.
Thanks again Audax for hosting this month!
Until we bake again...
Penny
Here is the recipe:
Starring- in order of Appearance!
Servings: about eight 2-inch (5 cm) scones or five 3-inch (7½ cm) scones
The recipe can be doubled:
- 1 cup (240 ml) (140 gm/5 oz) plain (all-purpose) flour
- 2 teaspoons (10 ml) (10 gm) (1/3 oz) fresh baking powder
- ¼ teaspoon (1¼ ml) (1½ gm) salt
- 4 tablespoons (30 gm/1 oz) frozen grated butter (or a combination of crisco and butter)
- 1/4 cup dried Blueberries (or strawberries or raisins etc) (45 gm)
- Approximately ½ cup (120 ml) cold buttermilk
- 1 Tablespoon sugar (15 gm)
- Optional 1 tablespoon milk, for glazing the tops of the scones
Directions:
1. Preheat oven to very hot 475°F/240°C/gas mark 9.
2. Triple sift the dry ingredients into a large bowl. (If your room temperature is very hot
refrigerate the sifted ingredients until cold.)
3. Rub the frozen grated butter (or combination of fats) into the dry ingredients until it resembles
very coarse bread crumbs with some pea-sized pieces if you want flaky scones or until it
resembles coarse beach sand if you want tender scones.
3A. Add the dried fruit and 1 tablespoon sugar
4. Add nearly all of the liquid at once into the rubbed-in flour/fat mixture and mix until it just
forms a sticky dough (add the remaining liquid if needed). The wetter the dough the lighter
the scones (biscuits) will be!
5. Turn the dough out onto a lightly floured board, lightly flour the top of the dough. To achieve
an even homogeneous crumb to your scones knead very gently about 4 or 5 times (do not
press too firmly) the dough until it is smooth. To achieve a layered effect in your scones knead
very gently once (do not press too firmly) then fold and turn the kneaded dough about 3 or 4
times until the dough has formed a smooth texture. (Use a floured plastic scraper to help you
knead and/or fold and turn the dough if you wish.)
6. Pat or roll out the dough into a 6 inch by 4 inch rectangle by about ¾ inch thick (15¼ cm by 10
cm by 2 cm thick). Using a well-floured 2-inch (5 cm) scone cutter (biscuit cutter), stamp out
without twisting six 2-inch (5 cm) rounds, gently reform the scraps into another ¾ inch (2 cm)
layer and cut two more scones (these two scones will not raise as well as the others since the
extra handling will slightly toughen the dough). Or use a well-floured sharp knife to form
squares or wedges as you desire.
7. Place the rounds just touching on a baking dish if you wish to have soft-sided scones or place
the rounds spaced widely apart on the baking dish if you wish to have crisp-sided scones.
Glaze the tops with milk if you want a golden colour on your scones or lightly flour if you
want a more traditional look to your scones.
8. Bake in the preheated very hot oven for about 10 minutes (check at 8 minutes since home
ovens at these high temperatures are very unreliable) until the scones are well risen and are
lightly coloured on the tops. The scones are ready when the sides are set.
9. Immediately place onto cooling rack to stop the cooking process, serve while still warm.
Variations on the Basic recipe
Cheese and Chive – follow the Basic recipe above but add ¼ teaspoon of baking soda, after Step 2 add
½ teaspoon sifted mustard powder, ¼ teaspoon sifted cayenne pepper (optional), ½ cup (60 gm/2 oz)
grated cheese and 2 tablespoons finely chopped chives into the sifted ingredients, in Step 3 aim of
beach sand sized pieces of fat coated in flour, in Step 5 knead the dough, rounds are widely spaced in
the baking dish, sprinkle the rounds with cracked pepper.
Storage & Freezing Instructions/Tips:
Scones are best eaten warm. Scones (biscuits) are really easy to store – bag the cooked and cooled scones and freeze until needed then reheat in a moderate hot for a few minutes.

10 comments:
These look great and I love the cutter and your grater too! I live in London and don't eat many scones but I remember a holiday to Devon a few years ago where I ate scones everyday - happy memories! I made the cheese scones and am looking forward to making another batch soon.
Te quedaron estupendos.
Fabuloso es paso a paso.
Saludos
Carl left a comment:
Looks Yummy!!!!
Thank you so much,Penny!
I, too, have a passion for scones!
I hope all is well with you and Dan
xxx
Ray
These are awesome! I can't wait for Sunday for a repeat performance.... warm scones on a snowy day... what could be better?
Hi Penny, I'm going to try these tomorrow for Sunday brunch!! They look so-o-o delicious!
I have never been one to bake but since I've been following your blog, I now want to try to do everything. You have a way of making baking fun. I will try to make these scones ......... not right now ..... but soon. Do you think that you could buy me a square cutter and a Graeta??? I don't have these in my tool box.
Arlene
I'm so happy that the scones worked out so well and that square cutter is so so cute and Graeta is adorable a wonderful result on this challenge. Cheers from Audax in Sydney Australia.
Your scones are fantastic, and your gadgets are so lovely! Graeta is adorable :)
Meep! I love your scone cutter! I don't know why a square one is cuter than a round one... I think it's the handle? Your scones look awesome, too :)
Post a Comment